In this blog post I will show you how I set up my VS Code environment to develop custom solvers in OpenFOAM. I assume you already have a working installation of OpenFOAM on your system and have it already sourced. Also VS Code should already be installed. In my example I will be using OpenFOAM 12 (so I will be using the new modular OpenFOAM approach, but this should not matter too much for the tutorial).
Now we can start setting up VS code for our needs.
-
Syntax highlighting for case files
The first extension I use is OpenFOAM created by Zhikui Guo. It is not directly linked to OpenFOAM development but it gives you better highlighting for your dicts and more. And, of course, setting up test cases to verify and validate new implementations is a common task. It is important not to forget to set up the file associations in your VS Code settings:
// .vscode/settings.json

"files.associations": {
  "*Dict": "OpenFOAM",
  "*Properties": "OpenFOAM",
  "fvSchemes": "OpenFOAM",
  "fvSolution": "OpenFOAM",
  "**/constant/g": "OpenFOAM",
  "**/0/*": "OpenFOAM"
}
This can easily be extended if you want to include more files.
-
IntelliSense for OpenFOAM development
Now we get to the actual code development. This part is inspired by this OpenFOAMWiki entry. Firstly, we are going to install the clangd extension for VS Code. This will provide the language server for our uses. Make sure you actually install the necessary language server. This can be done by pressing
Ctrl + Shift + Pand entering> clangd: Download language serverand then following the prompt. Clangd requires a database of compile commands. For this we are going to use Bear. To install Bear on a Linux system simply run:sudo apt update sudo apt install bearNow you can compile your code with
bear -- <your_build_command>which will generate the neededcompile_commands.jsondatabase. After a few seconds clangd should automatically provide links to definition and IntelliSense.
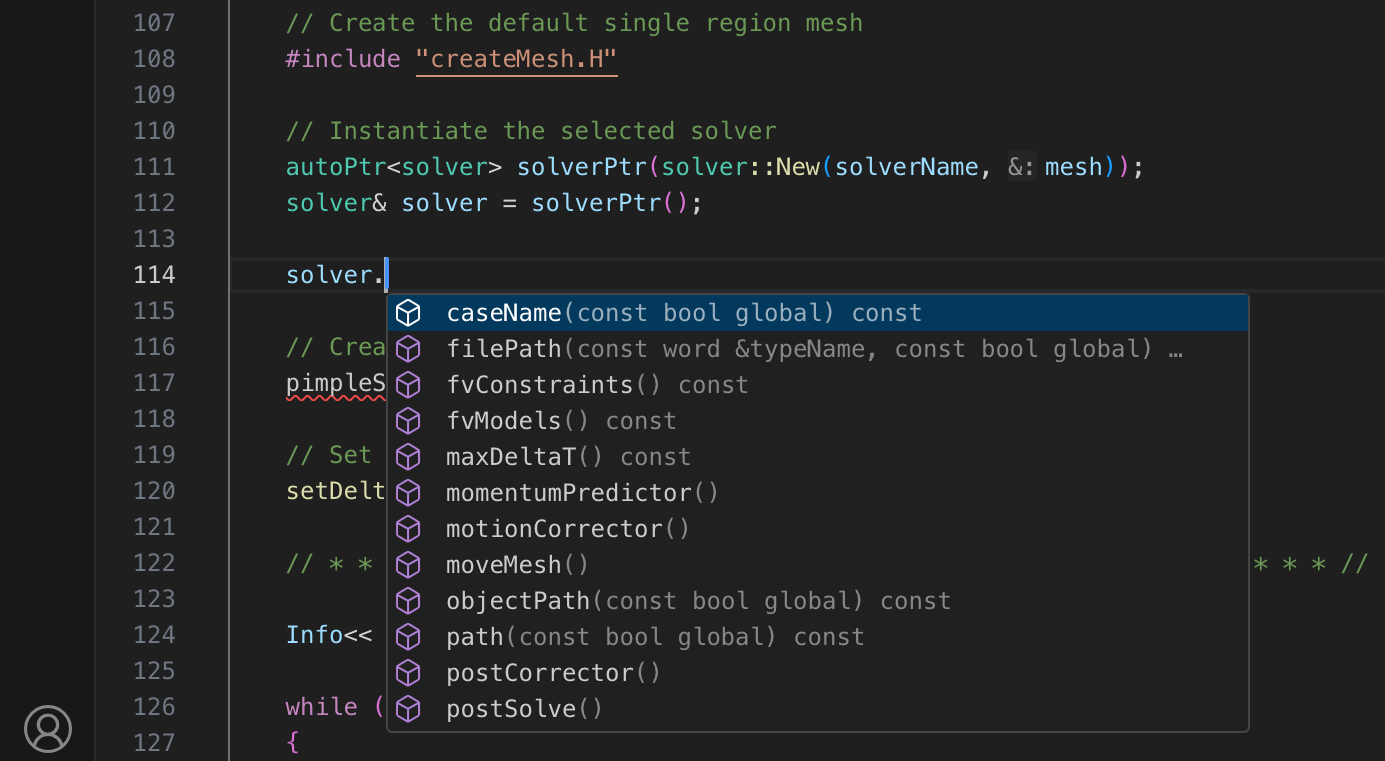
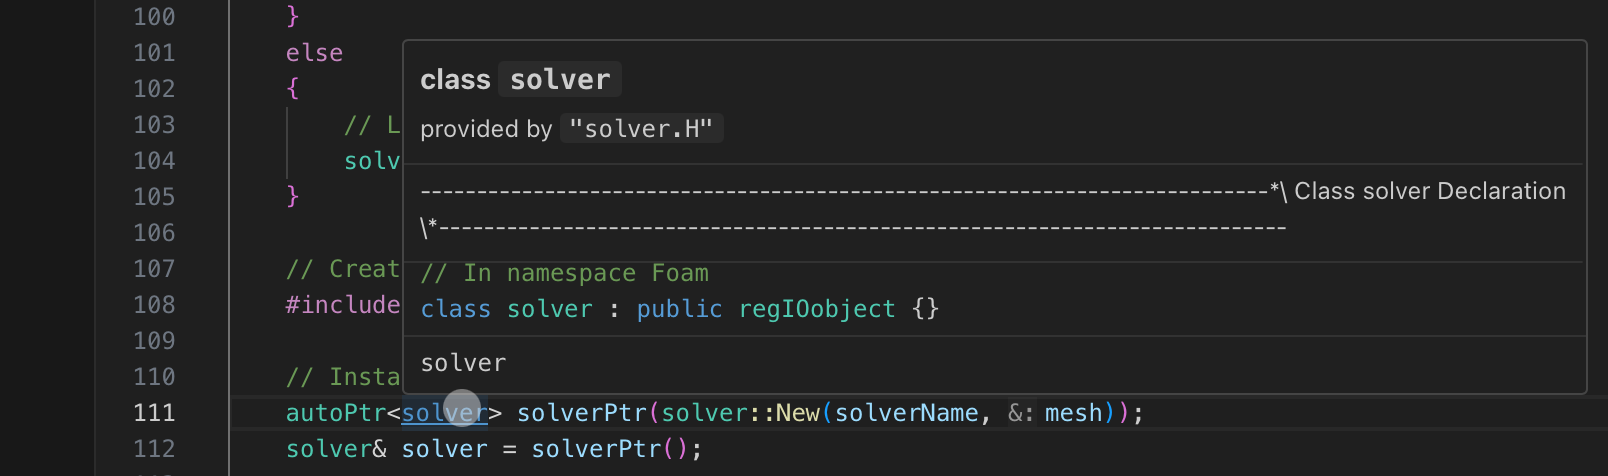
To give you an idea of how this works together I will give an example with the standard solver runner foamRun.
Firstly, we create a folder where we want to do our future developments. Then we copy the base solver to our directory and rename it:
cp -r $FOAM_APP/foamRun .
mv foamRun myFoamRun
cd myFoamRun
Afterwards we rename the foamRun.C file and make some basic changes to the Make settings to compile a custom variant of foamRun called myFoamRun:
# Make/files

setDeltaT.C
myFoamRun.C

EXE = $(FOAM_USER_APPBIN)/myFoamRun
Now we can create our compile script Allwmake containing a call to bear:
# Allwmake

bear -- wmake -j
This is will compile our code and automatically create the database file for clangd. After a few seconds everything should be up and running. Here you can see two examples of how clangd can improve your workflow for OpenFOAM development: